Extracting list of awarded badges on Moodle

A nice feature of Moodle is badges. Badges can be given to students as rewards for good actions, and incite them to do better and follow activities.

However, as often in Moodle, the functionalities are quite limited. One missing feature is the ability to give a badge to a list of user from an external system, e.g. using a CSV file. You can select students one by one in a list, which is cumbersome. As most as possible, for mass awarding you should try to use some “scripting” : for instance awarding badges when users finish an activity, with a certain grate.

The more problematic one I did not forsee was the inability to export badges. I wanted to give a small bonus points for students who won some badges. I thought of two leads : the moodle backups where I could extract the badges from the XML, and create a LTI activity to “steal” the badges.

The Moodle backups, even if you click on “Badges”, actually do not include badges in the backup… In 4 months this is the 4th bug I hit… After 3 confirmed bug that got no activity, I don’t even report them anymore… The Moodle community is rather slow, and internal resources are limited. The LTI 1.2 activities as far as I can tell do not have access to badges so that was a no-go as well.

So the solution was to do some web scraping. After trying multiple chrome extensions (connecting to moodle through GET/POST request would be very complicated because of OAuth), I could finally do a correct extraction with this extension : https://chrome.google.com/webstore/detail/web-scraper-free-web-scra/jnhgnonknehpejjnehehllkliplmbmhn/related?hl=en

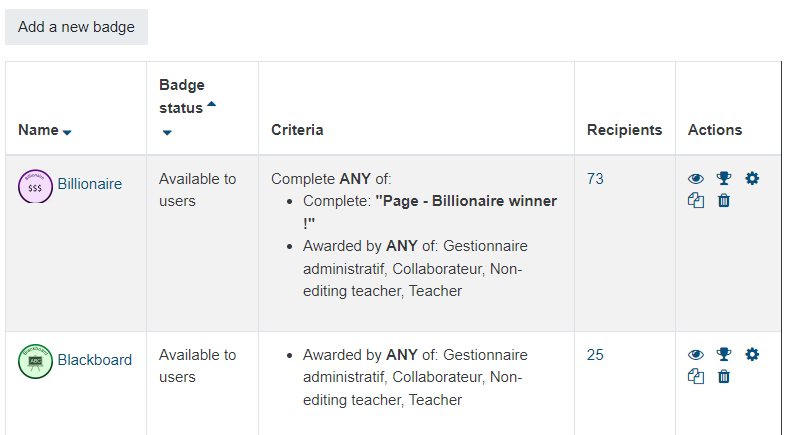
This extension supports following links, because there’s of course no web pages allowing to see all badges per students. You must “click” on the number of students for each badge, and then follow the pagination as there’s a limit of 50 students per pages.

TLDR

Install the extension, go on the “Manage badges” pages on your Moodle course, and then press F12 to open chrome developer tools. Go to the new “Web Scraper” page and then “Create new sitemap” -> “Import sitemap”.

Here’s the “sitemap” defining how to follow links and scrape badge names, students that were awarded the badges, while supporting pagination.

Moodle 3.9:

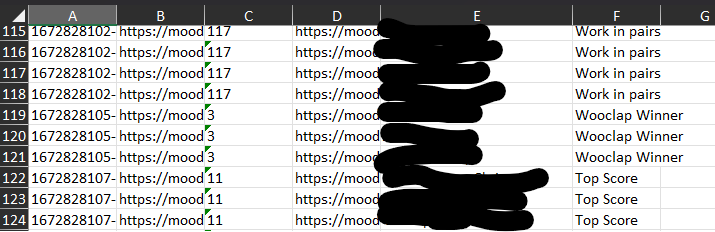
{"_id":"moodle_badges","startUrl":["https://moodle.uclouvain.be/badges/index.php?type=2&id=XXXX"],"selectors":[{"id":"Awards","multiple":true,"parentSelectors":["_root"],"selector":".awards a","type":"SelectorLink"},{"id":"Element","multiple":true,"parentSelectors":["Pages"],"selector":"tbody tr","type":"SelectorElement"},{"id":"Name","multiple":false,"parentSelectors":["Element"],"regex":"","selector":".cell.c0 a","type":"SelectorText"},{"id":"Pages","paginationType":"clickMore","parentSelectors":["Awards","Pages"],"selector":"nav:first-of-type li a[aria-label=\"Next\"].page-link","type":"SelectorPagination"},{"id":"BadgeName","multiple":false,"parentSelectors":["Awards"],"regex":"","selector":"h1","type":"SelectorText"}]}

Moodle 4.x:

{"_id":"moodle_badges","startUrl":["https://moodle.uclouvain.be/badges/index.php?type=2&id=8590"],"selectors":[{"id":"Awards","multiple":true,"parentSelectors":["_root"],"selector":".awards a","type":"SelectorLink"},{"id":"Element","multiple":true,"parentSelectors":["Pages"],"selector":"tbody tr","type":"SelectorElement"},{"id":"Name","multiple":false,"parentSelectors":["Element"],"regex":"","selector":".cell.c0 a","type":"SelectorText"},{"id":"Pages","paginationType":"linkFromHref","parentSelectors":["Awards","Pages"],"selector":".mt-1:first li:last-child a","type":"SelectorPagination"},{"id":"BadgeName","multiple":false,"parentSelectors":["Awards"],"regex":"","selector":"h1","type":"SelectorText"}]}

Press Sitemap -> Scrape and voilà. After a while, you can download a CSV or an XLSX.

As a bonus, what I want is the number of badges per students, so here’s the formula to put on the student list where the Name and FirstName are separated columns:

=NB.SI(Badges!E:E;CONCAT([@Name];" ";[@FirstName]))

Tested on Moodle 3.9.

Project 4 deadline extended

Deadline extended to Thursday 13:59

Please take this time to write tests and merge them using the git at https://gitlab.montefiore.ulg.ac.be/INFO0940/project4scripts

Please already try to submit now with a barely working sys_pfstat allowing obvious error to be catched as early as possible.

Fork & Exec system calls to implement a shell

A shell, typically parse a command, then fork (duplicates itself).

The duplicated process replaces itself using Execvp by the program described in the command

The other process wait for the duplicated one to exit using waitpid. When that happens it prints the prompt again, ready for the next one to come. And the whole thing restarts again.

Not a very hard life.

Here are the important parts of the manpages of the 3 functions :

Fork

NAME
fork – create a child process

SYNOPSIS
#include <unistd.h>

pid_t fork(void);

DESCRIPTION
fork() creates a new process by duplicating the calling process. The
new process is referred to as the child process. The calling process
is referred to as the parent process.

The child process and the parent process run in separate memory spaces.
At the time of fork() both memory spaces have the same content.

RETURN VALUE
On success, the PID of the child process is returned in the parent, and
0 is returned in the child. On failure, -1 is returned in the parent,
no child process is created, and errno is set appropriately.

Execvp

EXEC(3) Linux Programmer’s Manual EXEC(3)

NAME
execvp – execute a file

SYNOPSIS
#include <unistd.h>
int execvp(const char *file, char *const argv[]);

DESCRIPTION

The execvp() function replaces the current process image with
a new process image.

The initial argument for this function is the name of a file that is
to be executed.

The const char *arg can be thought of as arg0, arg1, …, argn.
Together they describe a list of one or more pointers to null-termi‐
nated strings that represent the argument list available to the exe‐
cuted program. The first argument, by convention, should point to the
filename associated with the file being executed. The list of argu‐
ments must be terminated by a null pointer, and, since these are vari‐
adic functions, this pointer must be cast (char *) NULL.

RETURN VALUE
The exec() functions return only if an error has occurred. The return
value is -1, and errno is set to indicate the error.

waitpid

NAME
waitpid – wait for process to change state

SYNOPSIS

pid_t waitpid(pid_t pid, int *status, int options);

DESCRIPTION

The waitpid() system call suspends execution of the calling process
until a child specified by pid argument has changed state. By default,
waitpid() waits only for terminated children.

A word about mode 3

First, you probably noted that it’s mostly a bonus, start the mode 3 code when everything else is finished.

We already saw in the first slides how the rx_rings of the e1000 NIC work. Normally you also now the main receive function : e1000_clean_rx_irq.

There is one struct e1000_rx_ring per hardware RX ring. Normaly, there is only one ring (and you should only care about one for step 7).

I think the fields are pretty well defined (for once…) :

191 struct e1000_rx_ring {
192         /* pointer to the descriptor ring memory */
193         void *desc;
194         /* physical address of the descriptor ring */
195         dma_addr_t dma;
196         /* length of descriptor ring in bytes */
197         unsigned int size;
198         /* number of descriptors in the ring */
199         unsigned int count;
200         /* next descriptor to associate a buffer with */
201         unsigned int next_to_use;
202         /* next descriptor to check for DD status bit */
203         unsigned int next_to_clean;
204         /* array of buffer information structs */
205         struct e1000_rx_buffer *buffer_info;
206         struct sk_buff *rx_skb_top;
207 
208         /* cpu for rx queue */
209         int cpu;
210 
211         u16 rdh;
212         u16 rdt;
213 };

The desc is a pointer to the memory zone, containing the ring. This memory zone is accessible by the NIC itself through the dma address. The ring is a contiguous zone of e1000_rx_desc structures. Usually you access it with

E1000_RX_DESC(R, i)

where R is the ring pointer and i the index of the descriptor.

One descriptor i composed of :

522 struct e1000_rx_desc {
523         __le64 buffer_addr;     /* Address of the descriptor's data buffer */
524         __le16 length;          /* Length of data DMAed into data buffer */
525         __le16 csum;            /* Packet checksum */
526         u8 status;              /* Descriptor status */
527         u8 errors;              /* Descriptor Errors */
528         __le16 special;
529 };

The buffer_addr variable is a pointer to the physical memory address where a packet can be received. The problem is that the Kernel normal put hte address of a skbuff->data there. But when a packet is received and its content is copied inside that buffer, how to get back the corresponding skbuff? This is why the e1000_rx_ring structure has also a buffer_info pointer. There is exactly as many buffer_info than e1000_rx_desc.  The buffer info contains all the software-only information that we need to keep about each descriptors, such as the skbuff which will receive the data pointed by buffer_addr.

Before receiving any packets, all buffer_addr have to be setted ! Or the NIC wouldn’t know where to put the data. This is done in e1000_configure :

407         for (i = 0; i < adapter->num_rx_queues; i++) {
408                 struct e1000_rx_ring *ring = &adapter->rx_ring[i];
409                 adapter->alloc_rx_buf(adapter, ring,
410                                       E1000_DESC_UNUSED(ring));
411         }

alloc_rx_buf is a pointer to the function e1000_alloc_rx_buffers (if you don’t use jumbo frame, and you shouldn’t here).  We see that this functions is called for all rx rings.

The function e1000_alloc_rx_buffers is defined at line 4561.  It calls “e1000_alloc_frag” for each buffers between rx_ring->next_to_use (initialized to 0) up to cleaned_count (in configure, the size of the ring is passed, so this is equivalent to a full reset).

The memory obtained from e1000_alloc_frag is (probably) not accessible by hardware, so we have to map “DMA map” it :

4613                 buffer_info->dma = dma_map_single(&pdev->dev,
4614                                                   data,
4615                                                   adapter->rx_buffer_len,
4616                                                   DMA_FROM_DEVICE);

You will have to do this with your fastnet buffers !

Then the result in dma is putted inside buffer_addr (line 4650).

When some packet are received, e1000_clean_rx_irq will make skbuff out of them, and we’ll need to allocate new buffers and put pointers to them inside the ring so next packet can be received. This is done at the end of e1000_clean_rx_irq :

4481         cleaned_count = E1000_DESC_UNUSED(rx_ring);
4482         if (cleaned_count)
4483                 adapter->alloc_rx_buf(adapter, rx_ring, cleaned_count);

So when the device goes in mode 3 you have to :

  • Change the adapter->alloc_rx_buf function per your new one which will set buffer_addr to dma mapped fastnet buffers.
  • Do a full pass of a new alloc_rx_buf to replace all current skb buffers by fastnet buffers so all new packets will be received directly in the fastnet zone.

When a packet is received :

  • In fastnet mode 3, do not call any skb related function in clean_rx_irq : from line 4385 to 4401 which creates the skb, line 4424, line 4438, and 4453 to 4463.
  • Instead of line 4464 calling the kernel receive path, do the copy of the packet length to the fastnet buffer descriptor. Note that as for skb in buffer_info, you will need to keep a pointer to the related fastnet descriptor. There is no need to call the kernel receive path anymore : the whole purpose of mode 3 is to directly receive the packet in userspace. Just set the length so the user knows there is a packet available inside the corresponding buffer !

What I want with a “generic way” is that the least possible code has to be written inside e1000, so do not implement any fastnet descriptor related code in e1000 : create a function in fastnet.c to get the next fastnet buffer that you will map, and use net_dev_ops or adapter-> functions so that fastnet ioctl can call a generic function like dev->ops->set_in_fastnet_zc_mode that any driver may or may not implement.


Profiling of Socket, PCAP and Fastnet to receive RAW packets in userspace

The code source I presented is available at :

http://gitlab.montefiore.ulg.ac.be/INFO0940/rcvtest

I’m willing to merge any pull request (called merge request on gitlab, so that they don’t copy github too much^^). Especially for parsing arguments, having options like “-b” to set the buffer size instead of recompiling, …

Since the presentation I added a “do_something” function called for each received packets of each methods, it will simply read bytes 12 and 13 of the ethernet header and check if it’s an IP packet, and sum up the amount of IP packets. As I said in class, this allows to effectively read the content of the packet and is a much better benchmarking, as nobody receive raw packets in userspace to do nothing with them… So you will hit memory for each packets. For nearly all method you just memcopied the content to userspace, but in mode 3 the NIC writes directly the packet to the buffer so when you’ll access the content you’ll loose ~300cpu cycles just to wait for the packet content to be bringed to cache, so it would be unfair to just get the packet length and not the data.

I also added a “socket” method, using the standard Linux socket which works like the fastnet read function. As you’ll probably find out, PCAP has already a big advantage using a special feature of the Kernel to receive much like what we do in Fastnet Step 7 : packet_mmap. I imagine you’ll be happy to see that you, humble student, can already do better than packet_mmap which is the best that Linux can offer to receive raw packets. Those doing the implementation for mode 3 will be able to see how much faster we can go.

If people are interested to change the mode 3 to make it work with packet_mmap and try to submit a patch to the linux networking team, they can contact me and we’ll do it together. It’s time to make Linux move regarding fast packet capture and if our patch is not accepted, it will at least piss of some people and make linux move in the right direction… I know you have a “personal project” course in master 1 that can surely credit this task.

Some of the commands I use in class :

sudo ip link add veth0 type veth peer name veth1

sudo ifconfig eth2 up

sudo tcpreplay -l 0 -q -i vboxnet0 –preload packet

sudo tcpreplay -l 0 –mbps=100.0 -q -i vboxnet0 –preload packet

The 64byte UDP packet I made is available at https://www.tombarbette.be/packet

If you use a bridge, update the packet to set its source and destination mac address to the mac address of the bridge on your host and the mac address of the ethernet port on your virtual machine.

Step 7 : Go back to mode 0 on file close

The Step 7 will be easier if you go back to mode 0 when the file descriptor is closed. It can happen if the user call close(fd) , or it will be automatically done when application exits.  So there won’t be a device in fastnet mode anymore without an open file descriptor. It also means that module_exit has nothing to do on exit : if you putted .owner = THIS_MODULE correctly, it won’t be closed until there is still open file descriptors, so when the module is removed you know that there is no device in fastnet mode.

This seems more like a file should be handled, but mimics less the syscall, as there is nothing “opened” after a syscall, there is no state, no “session” and therefore no “close”.

This also avoid the need to have a list of devices currently in fastnet mode, which makes it easier. A lot of groups did use the first_net_device facility but that won’t go over a device currently being removed but blocked by the dev_hold/dev_put reference. So the exit function was a little messy, this should make it easier… Multiple groups also called their “free_list_in_buffer” function on all devices given by first_net_device. If the rx_handler (and therefore the rx_handler_data) wasn’t yours, you’ll follow an unknown pointer and free things randomly… Bad ! In the close function, you know it’s your device, you know its current mode, so it’s easy. The specification that there is only one file descriptor per device, and one device per file description is still true, so the close function is pretty straight forward.

The assignment has been updated accordingly.

Update about Step 6

I updated the Step #6 with more specifications as I received quite a lot of questions. Mostly :

  • The buffers are indeed per-device, so if we have two open()+ioctl()+read() sequences about two different device, each read() will give packets from the device previously set by the ioctl() but not randomly from any of the devices.
  • I add the “user” constraint that only ioctl about the same devices can be given to one file descriptor. Each open operation create one new and independent file descriptor. You can think as /dev/fastnet as an “entry point”, but each open() give in fact a very different file, where the content of read() will depend on the previous ioctls.

You can use the private_data structure of the file* filp to remember things like the device passed to the ioctl in the read.

If you have already gone in a too different direction because you misunderstood something (or I wasn’t clear enough…) and don’t want to go back, contact me.

3 reasons why it is better to use rx_handler_private than adding fastnet_mode

Yes, it’s not in my corrected code on gitlab, but well, do what I say, not what I do.

– Modifying netdevice.h will force to rebuild and reinstall all modules that include it. If you don’t you’ll have errors on boot/when loading module for the old header.
– The pointer + private pointer is method is found in a lot of place in the kernel. Usually, you want to do some stuffs (a function) when something is done. That is called a callback. But usually you need some information, some context with this. When you ask de disk for some data, and you finally get back the block (after an IRQ), having just the block you asked is not enough… You’ll need to remember what you wanted to do with that block. You’ll find “private” structure in a lot of places. But pay attention : is it private for you, or private for someone else? In the case of the rxhandler, it’s pretty obvious as rx_handler_data (the private pointer) is set via register_handler : the owner is the one using rxhandler_register_data. But you also have a private space in netdevice for example (accessed through netdev_priv). For who it is private? Its intended user is the device owner, so the driver. If you modify it, you will corrupt the driver… So if you want to retain some per-device data but you’re not the creator of this net_device struct, this is absolutely not the way to go…
– If you add a variable, you have to initialize it, and add again some code.

I didn’t formalize about it in step 4 and 5, because I didn’t tried it… And because the kernel developers are really bastards some time (http://lxr.free-electrons.com/source/include/linux/netdevice.h?v=4.1#L1428 seriously? It would be faster to describe it than writing that…).

For Step 6, it’s more arguable if you need to add a fastnet field or not, as you also access a buffer of skbuff from the file operations. I didn’t specify what to do when the ioctl is called to go back to 0, but there is still packets to read… What should not happen is to leak the memory.

Note the __rcu macro before rx_handler_private definition in net_device.c… Some of you forgot to use rcu-specific accessors for dereferencing. I didn’t penalized either the usage of rcu or not, but for step 6, if you use a rcu pointer, you’ll have to do it right. Note that you shouldn’t play with RCU in your fastnet syscall/ioctl as netdev_rx_handler_register do it for you. Same for netdev_rx_handler_unregister. What you need to do is to use rcu_dereference in your rx_handler code to access the private data.

So next time, use RCU correctly, and try to use diverses private data when you register things. File also have some space for their backing file_operations 😉

consume_skb vs kfree_skb

Looking at the documentation of the function (or simply online at https://kernel.org/doc/htmldocs/networking/API-consume-skb.html) you’ll find that kfree_skb is intended to be used on error.

In our rx_handler, it’s a feature, not a bug. So consume_skb is better. If you used kfree_skb, It was okay regarding marking for Step 4.

Be warned that my last test will make a transfer of a big file through a mode 1 interface… If you forgot the free, it will fill the memory !